Showing posts with label furniture. Show all posts

Tuesday, February 28, 2023

Dining Room Wall Quilt

www.sew-handmade.blogspot.com

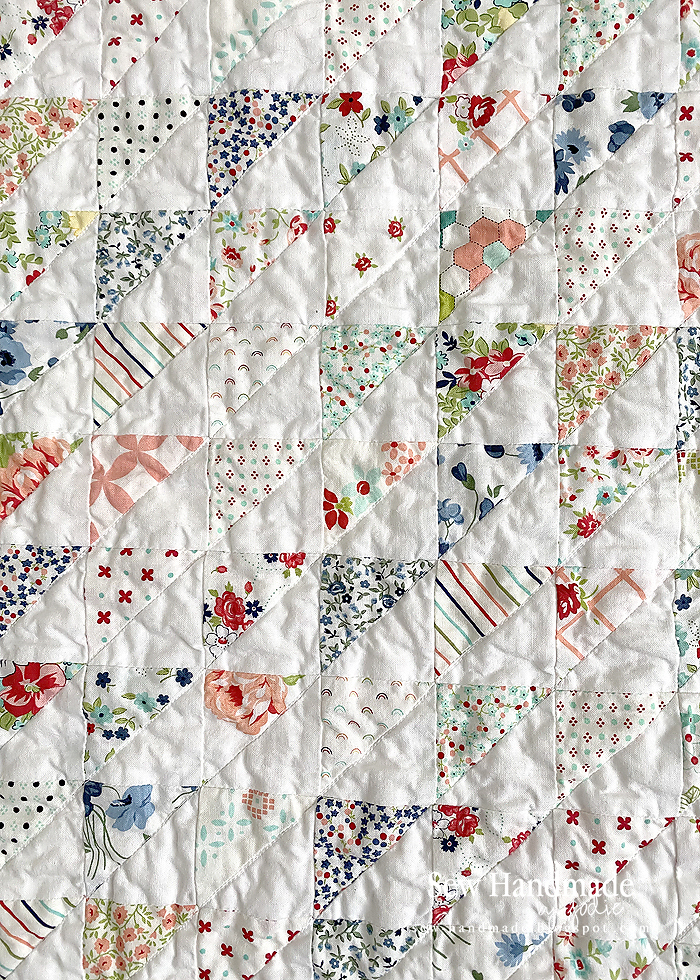
I used the triangle scraps from my low volume swoon quilt to make this sweet little wall hanging. 
www.sew-handmade.blogspot.com
It's made from the cream fabrics from various Bonnie & Camille fabric lines... my favorite. 
www.sew-handmade.blogspot.com
We recently became the new home for my husband's grandparent's dining room set. It's come together nicely. The buffet and table are from his grandparents and the clock is from my grandma. I also have my other grandma's sewing machine in this room, so it's quite the connection to our grandparents in here! 
I used this chicken wire board as decor and it "needed" a little wall hanging quilt. My idea is to use this board for holiday decor, but this quilt will be a nice neutral for in between. 

Friday, August 8, 2014

Chair Makeover

 My dad gave me this chair, which had been refinished and recovered somewhere around the time of my birth, I believe. After thirty-something years, it was definitely in need of an update.


I found this funky purple (my current favorite color) fabric at Joann's and thought it would be an unexpected pop for this old chair. 
My husband actually did the labor for me. I think it turned out so well! You may recall, he's pretty good at making furniture look amazing!
And if I'm taking pictures, my little ham wants to be in there!
 Here's a before & after........ pretty big difference!
Now to just decide where in this house this "new" chair wants to live. 

Sunday, November 4, 2012

China Cabinet Overhall (I'm in Love!)

Before we even moved in, I knew I was going to want to upgrade our china cabinet. We have a cute little old cabinet that we've been using for many years. But... it's just very little. And with a big dining room and a whole wall to fill, I was daydreaming of a more substantial piece of furniture. So... here's the "BEFORE" picture... 

I found this big mama through a friend in my mothers' group and ended up trading a diamond ring I found at the beach last Summer. The ring wasn't really my style (although I DO love diamonds...), but I loved the shape and the size of this china cabinet. However, I wanted to paint it. Luckily my husband recognized that he is a perfectionist and I am not... he offered to do the painting if I'd do the sanding. 
And I sanded. And sanded. And sanded. There's lots of little nooks and crannies in this hutch! 
 This weekend, it is finally done! My hubby did a GREAT job on the painting. I loooove how big and light and bright this baby is.

He did a little distressing to the paint, too, which I adore. Added benefit? I'm sure my kids will add some additional distressing to it, which means we don't have to stress or worry about every little nick or scratch now - it just adds to the character.
 We went with a funky turquoise color (which I am currently obsessed with) for the hardware. I LOVE the little bit of "wow" it adds to the cabinet.

 And here's the finished room! (See here for details about the little wreath and the table runner).


I love how this hutch turned out and am so so so thankful for all of my husband's work on it. The best part? He's pretty impressed with how it turned out, too, and is already talking about what ELSE we could paint and distress! It's like music to my ears...  : )

Saturday, November 3, 2012

Little Green Hutch

We bought this little green secretary desk & hutch from a listing on Craigslist. It is very cute, just the right size for this awkward little space just outside our kitchen, and has quite a bit of storage for the "command center" I need. Best of all? We got a heck of a deal on it, which made my husband's day when he realized he successfully negotiated with the seller, who is a local attorney! There's something about winning that argument that felt like an accomplishment!
 On top are some smell-good lavender stems, and these cute little "love" blocks I bought at a fundraiser for my daughter's school - you can see more of her blocks here on Facebook.
 Inside is a little turkey I made at my Mops group last week. Didn't he turn out cute? I'm loving the neck tie.
 More of the shelves. In the basket and glass box are some office supplies.
And the bottom part of the desk opens up to more storage and my current pile of catalogs and magazines. I love that it's all tucked away out of sight and isn't cluttering the kitchen counter (which drives me crazy!), but it's all still very easy to get to. 


Tuesday, May 15, 2012

Fun with Spray Paint

I've never spray painted before, but I have a long(ish) list of things I wanted to spray paint. I asked for my husband to teach me how, but he has been super busy. After talking with a friend, I decided to just go for it. What's the worst that could happen?

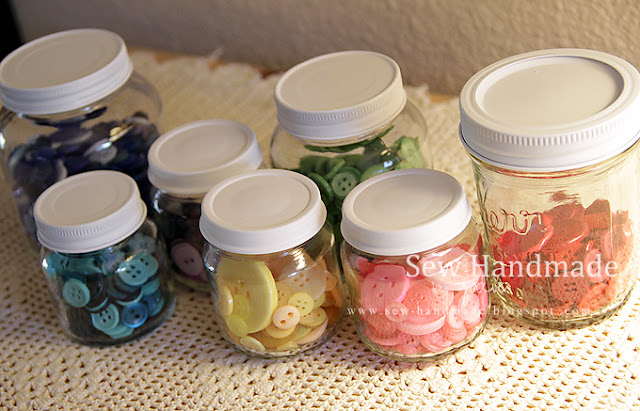
I started with the jar lids for my rainbow of buttons. They were a bunch of mismatched jam, baby food, and store-bought jars. I hoped a coat (or three!) of white spray paint would unite them. And it did!
 Some of the baby food expiration dates bled through every layer of paint. This is like 5 layers before I gave up! Luckily I had enough blank lids for the colors of the rainbow and these stamped ones can be used for something else. In person, it's actually pretty light and only noticeable up close.

And this cabinet. I bought this at Mervyn's sometime in the 1990's. I think it was about $25. It's cheap wood, but actually pretty sturdy and has lasted well over the years. We've used it for a bunch of different rooms for different purposes. In the new house, I think I'd like to use it as bathroom storage. Since our cabinets are a dark walnut, I wanted a white cabinet in there. And this one was showing some age, so it didn't seem like it would be offended with a fresh coat of paint.

I also have a bunch of other furniture similar to this - wood veneer-type material. I figured this little cabinet would be a good "trial run" to see how the spray paint turned out before committing to larger, more sentimental furniture.

I started by lightly sanding the "wood" to rough it up. Then I went to town. I did very light coats because I wasn't sure how heavy I could go before it would drip. It ended up being 4 light coats, but since it's a small cabinet it went very quickly and dried quickly in between.
Here's the result! 

Because I couldn't find any tape, I didn't bother. Again, this is a cheap-o little cabinet. It actually worked out quite nicely... it's a soft feathered look inside the drawer and cabinet doors. 


The inside remains the original wood color. And unless someone goes snooping in my bathroom, no one will ever know.   ; )

I also sprayed some keys (some new, some old) for another project I have in mind. Spray painting keys is the way to go... so much faster than painting them with a brush like I did for my framed keys project
More on the keys coming soon (I hope!). 

LinkWithin

Related Posts Plugin for WordPress, Blogger...